border
sSNAKESs : Reptile Forum
 

Go Back   sSNAKESs : Reptile Forum > Enclosure Creation Forums > General Enclosure Discussion

Notices

Closed Thread
 
Thread Tools Display Modes
Old 12-15-10, 12:41 PM   #1
Marica
Member
 
Marica's Avatar
 
Join Date: Sep-2010
Location: Calgary, AB
Age: 42
Posts: 381
Country:
DIY Wood Cage Build Guide

Please bare with me, this is my first DIY build guide. I really enjoy designing and building stuff for my animals and put a fair bit of research into this project. I’ve included links wherever I thought more information would be helpful. If you have any questions or comments I'd love to hear them.

First off, a big thanks to my dad for helping me build these cages and for lending his tools. And to Greg West of Cornel’s World for wiring the Flexwatt and his advice on its installation.

I based this build mostly off of this design/guide. Below is a sketch I created using 
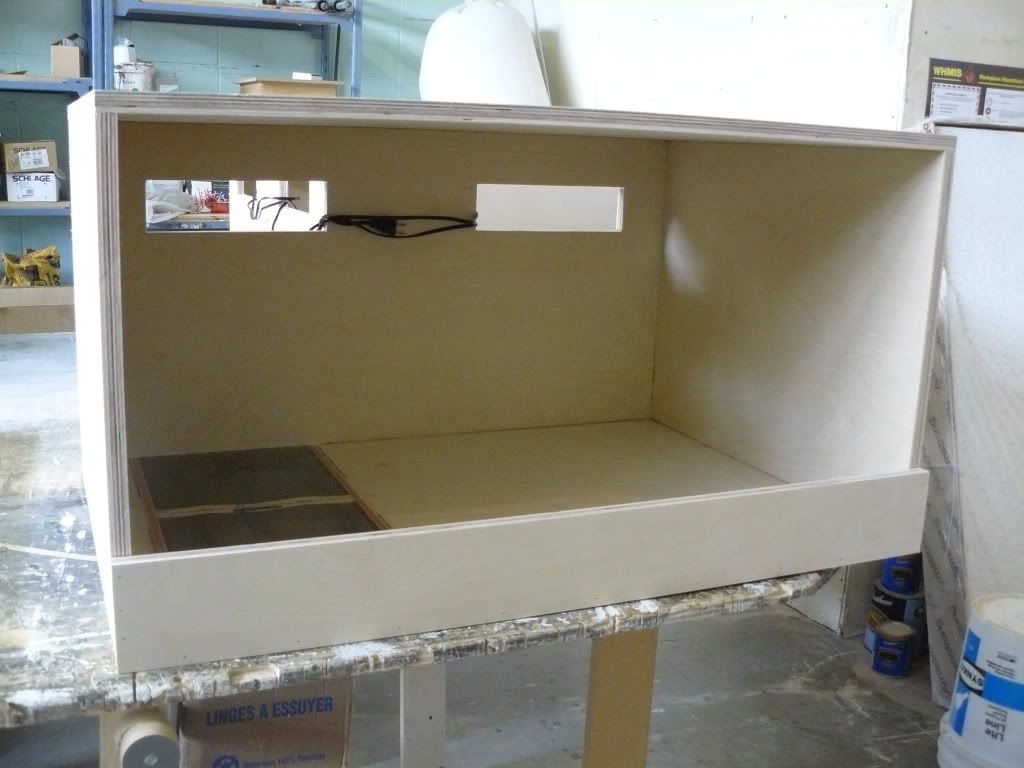
Google SketchUp showing 1 cage and a pedestal. I decided to make a pedestal as I didn't want the cage directly on the floor, nor did I want to have to crouch down too far to reach into the bottom cage.


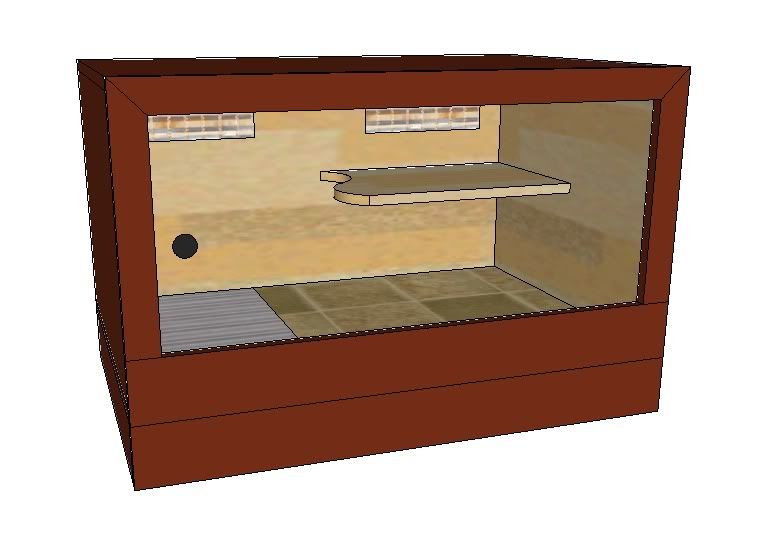
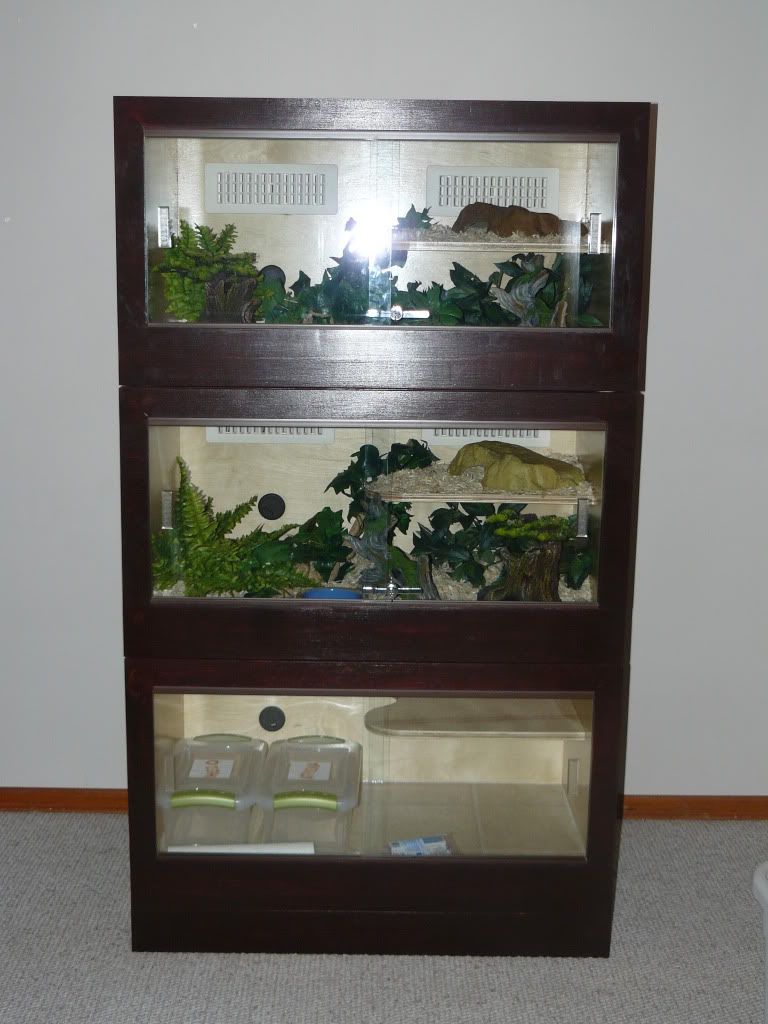
We built 3 cages, each approximately 3' wide x 2' deep x 1.5' high. We were able to get 3 cages and a pedestal out of 3, 4'x8' 3/4" birch sheets. You could also use oak or maple depending on the grain pattern you prefer but birch is generally the cheapest. An even cheaper option is of course melamine. These cages will house my adult Corn Snakes and I plan on building 6'x2' versions that I can stack with these when my Dumeril's Boas require larger accommodations.

Single Cage Cut List:

2 x 36"x24" - Top & Bottom
2 x 24"x18" - Sides
1 x 18"x34.5" - Back

1 x 4"x36" - Bottom Trim/Litter Dam
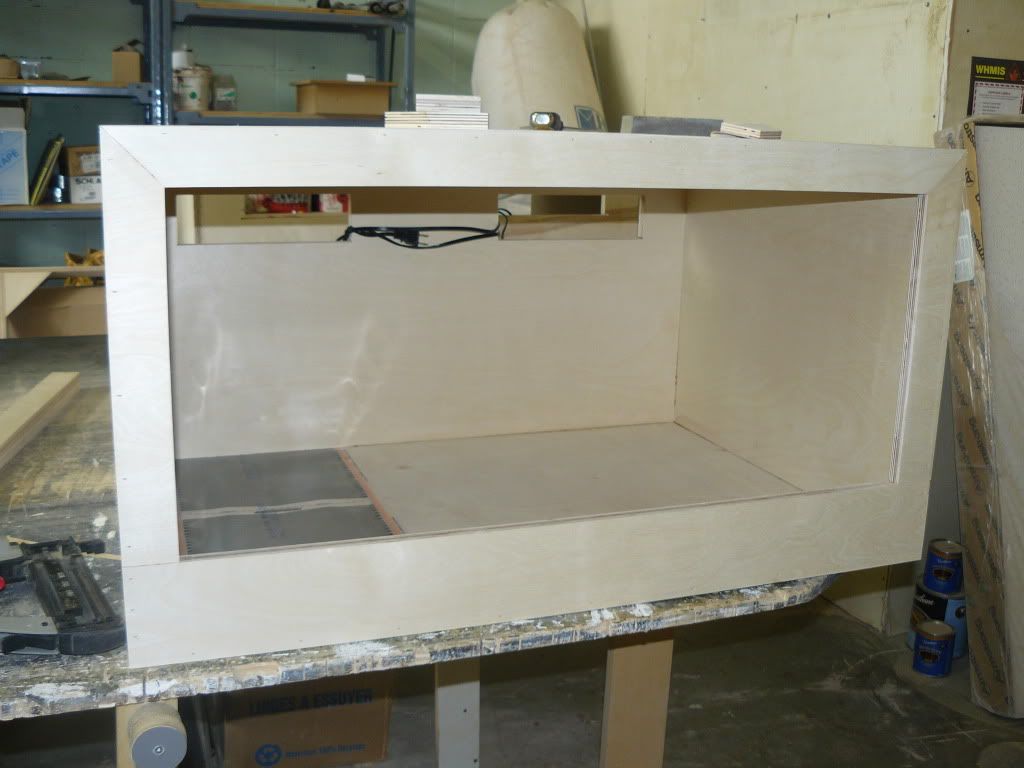
1 x 2"x37" - Top Trim
2 x 2"x16.5" - Side Trim

When doing our initial cuts we left the side and top trim pieces an inch longer so that we could get the angle cuts aligned perfectly later on. Though you could always adjust the length of the sides or the top and square them off. You could also get fancy and look into moulding trims to make it more ornate.

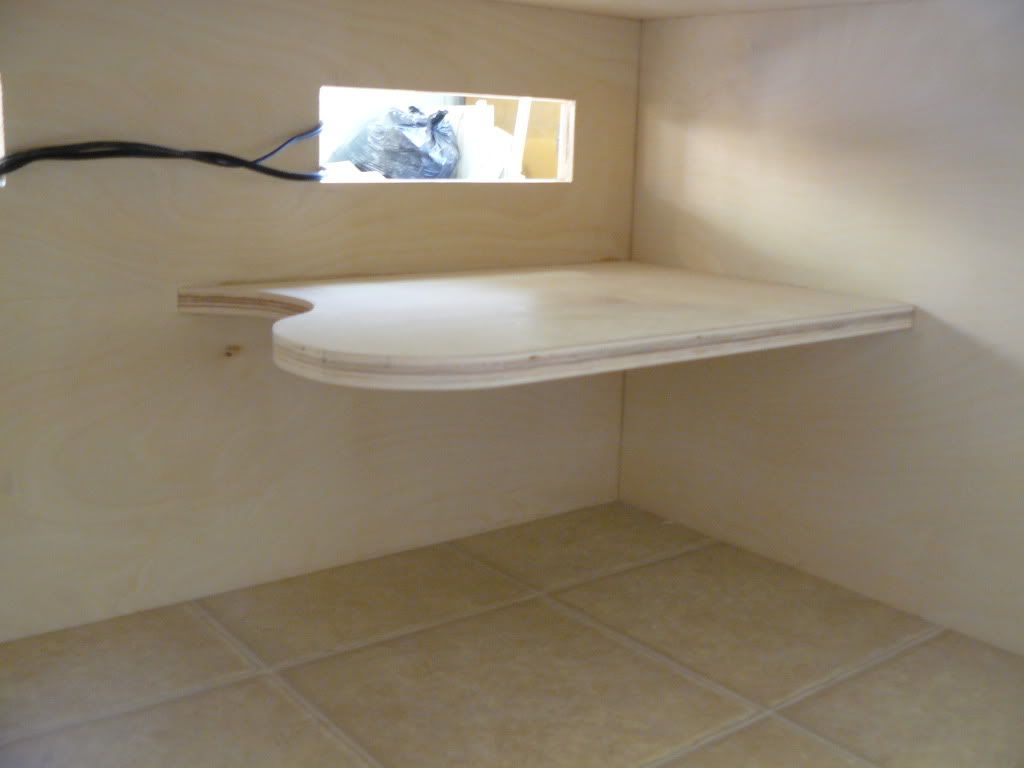
There should be some leftover for a ledge piece which you can cut to whatever shape you prefer. I made sure mine where large enough to contain a large Exo Terra hide.

Pedestal Cut List:

1 x 4"x36" - Front
1 x 4"x34.5" - Back
2 x 4"x24" – Sides

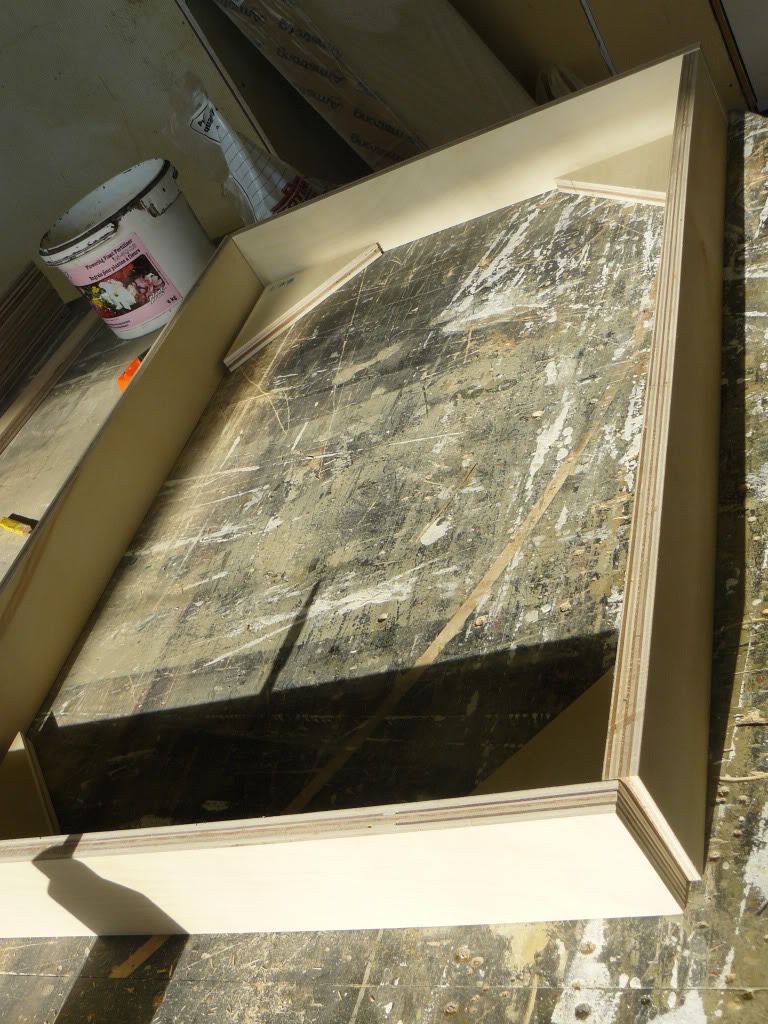
To keep our pedestal frame from shifting around we cut 4 small triangular pieces out of leftover for corner supports (shown below).

Material List:

- Wood Screws (150 box, size 8, 1.5")
- Wood Screws (3-4, 3” for attaching the ledge)
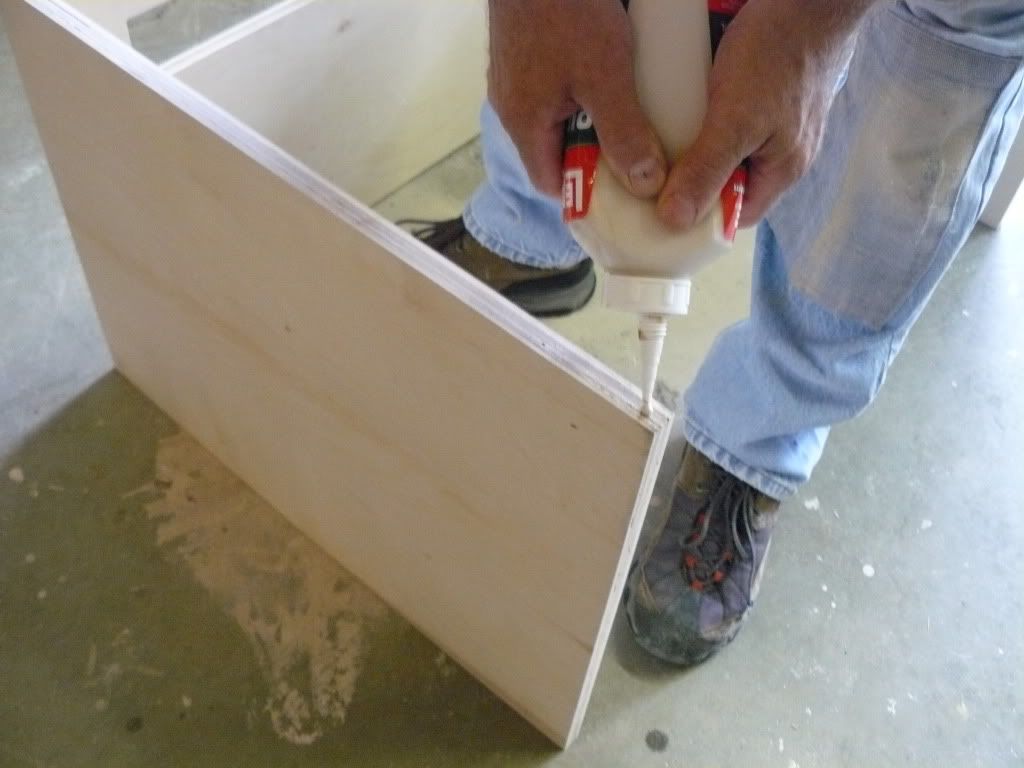
- Wood Glue (optional)
- Drill and 1/8" Drill Bit
- Screw Caps, Wood Filler (optional)
- Vents (personal preference as to quantity and style)
- Adjustable Desk Grommet (for thermometer/stat probe access)
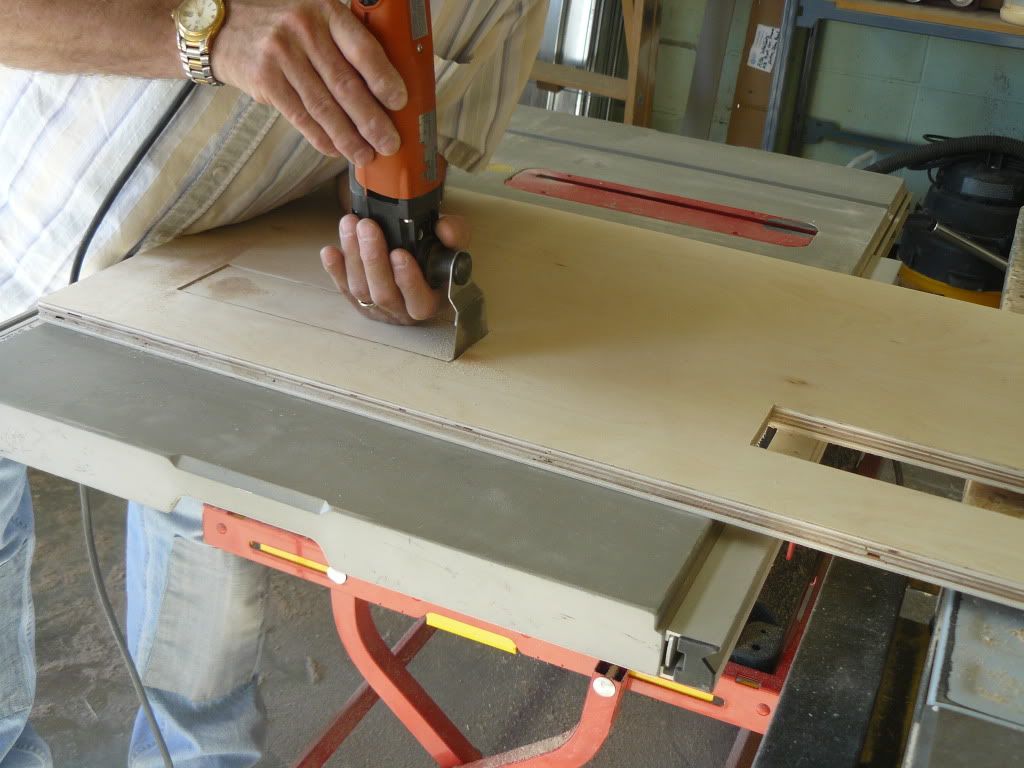
* Equipment (jigsaw, hole saw) to cut openings for vents and grommets
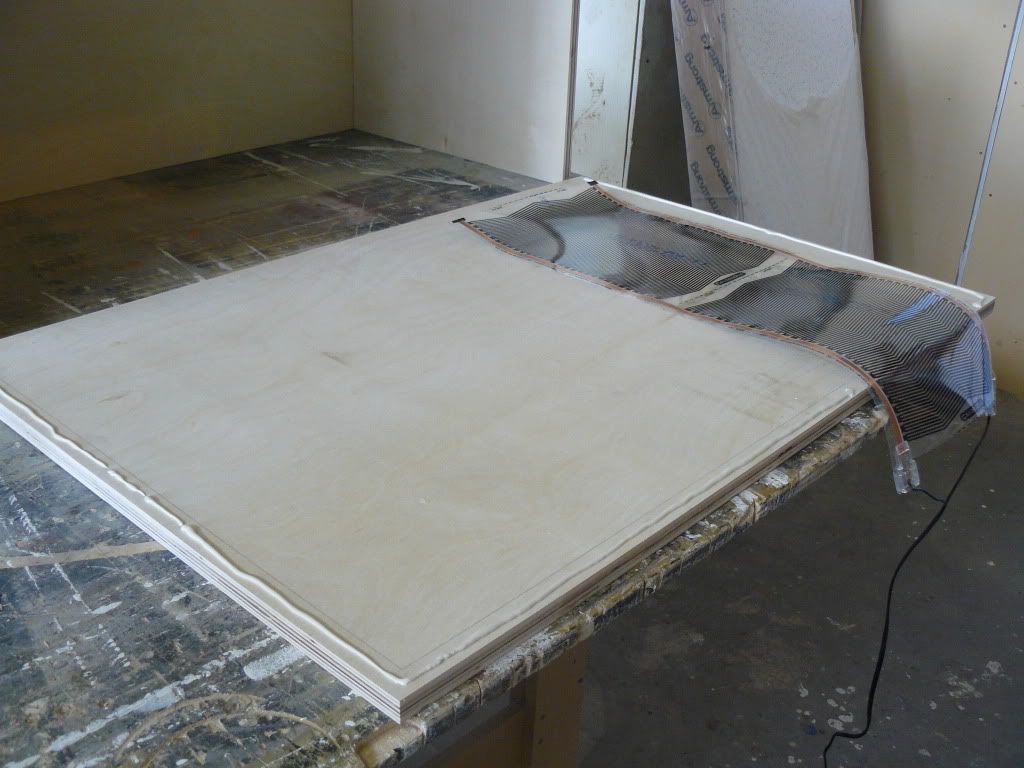
- 11"x24" Flexwatt (heat tape info)
- Linoleum & Adhesive
* Check with a floorcovering company if they have leftover or samples for cheap
- Sandpaper/Sanding Block
- Stain or Primer & Paint for the outside of the cage (optional)
- Water-Based Varathane
- Cloths/Brushes to apply finishes
- Silicone
- Glass (2 x 13"x16-3/4" - the glass needs to be approximately 1/2" less the height of the opening to allow it to fit into the track, the overlap is personal preference though I would suggest at least 1.5")
* Ask at a glass shop if they have any leftover pieces they'd be willing to give you a deal on
- Glass Track, Plastic or Metal (I prefer plastic)
* The glass shop should carry it and some hardware stores as well
- Glass Door Locks
- Stick-On Finger Pulls

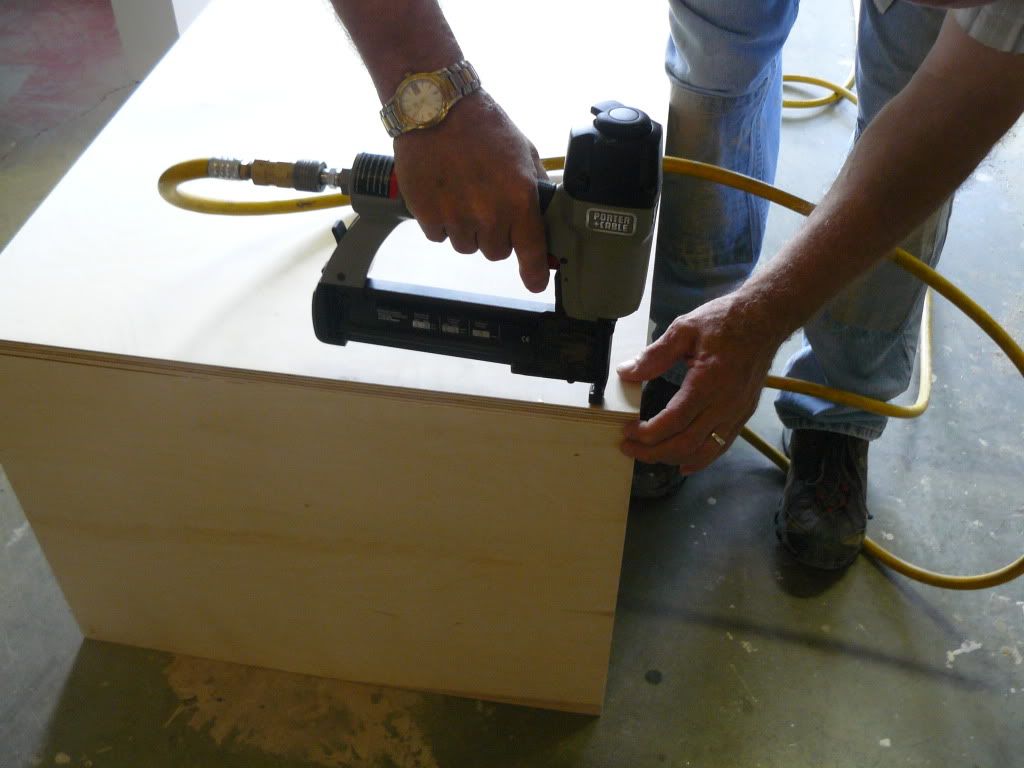
Since my dad has an air compressor we opted to use his nail gun as opposed to screws. If you are using screws you will want to drill pilot holes for them. I have used the term 'attach' in the assembly descriptions below as some may prefer to use nails, others screws.

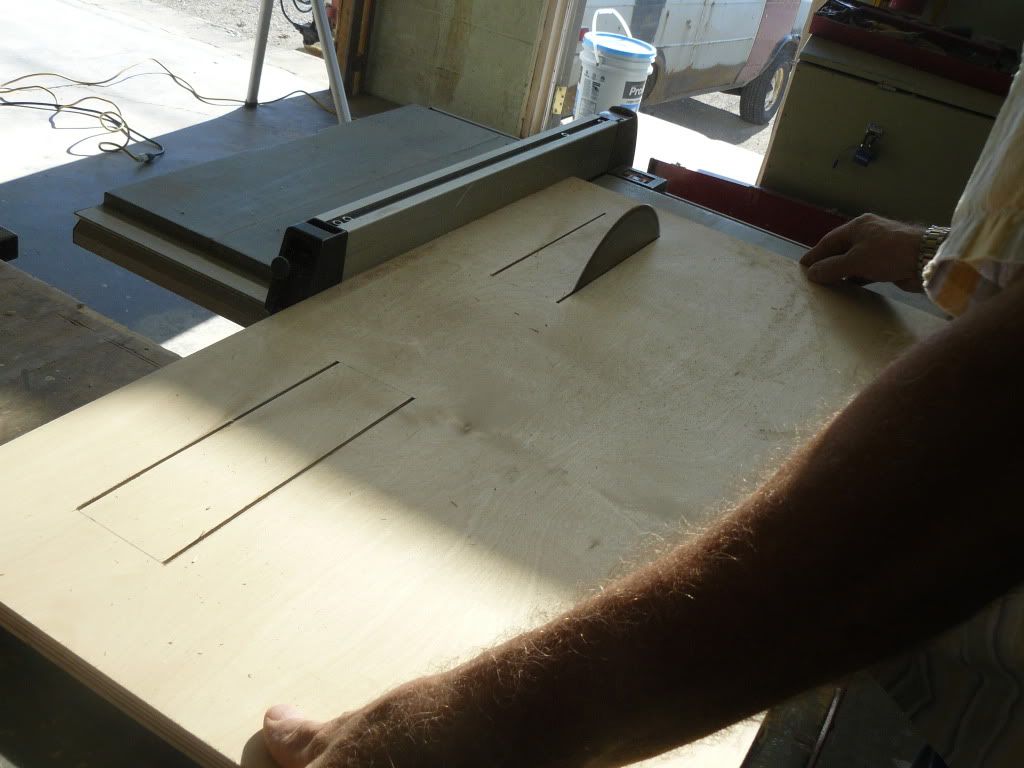
I had a difficult time finding circular vents so I picked up some rectangular floor registers. If you are concerned with the size of the slits in the vents you could purchase some screen mesh to surround them and tuck through the back.

Pedestal Assembly:

Attach the side pieces behind the front piece and the back inside the side pieces. I chose this method of placement with the cages as well so that the front would not show any edge grain. Next place the 4 corners inside the frame and attach.


Cage Assembly:

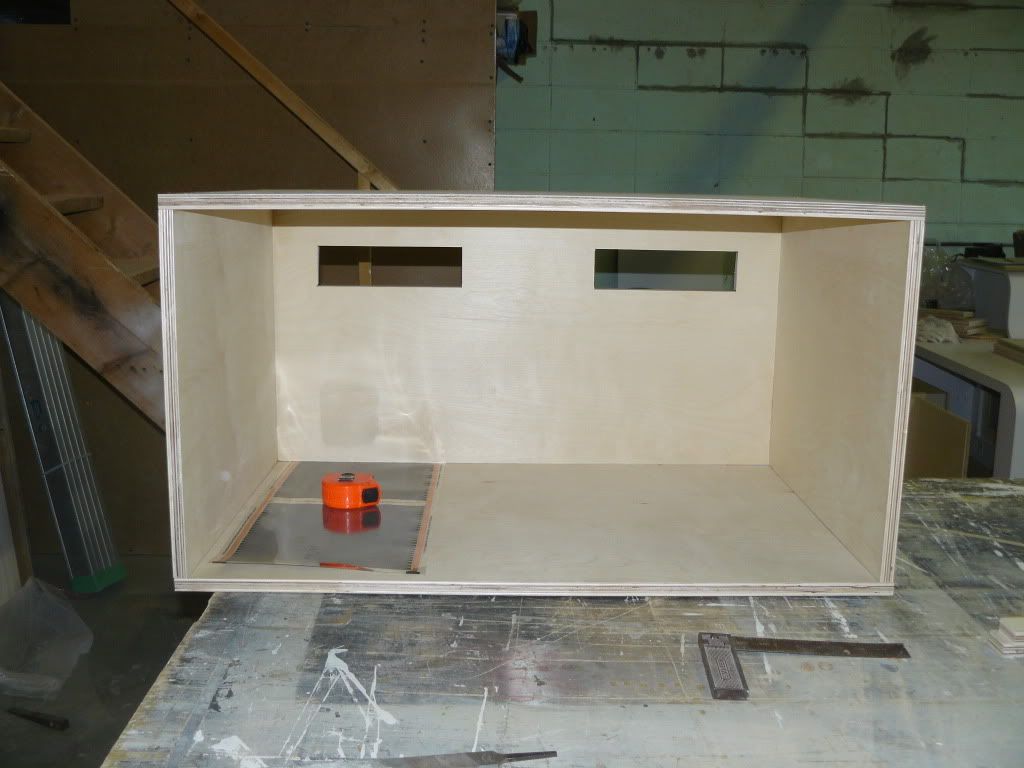
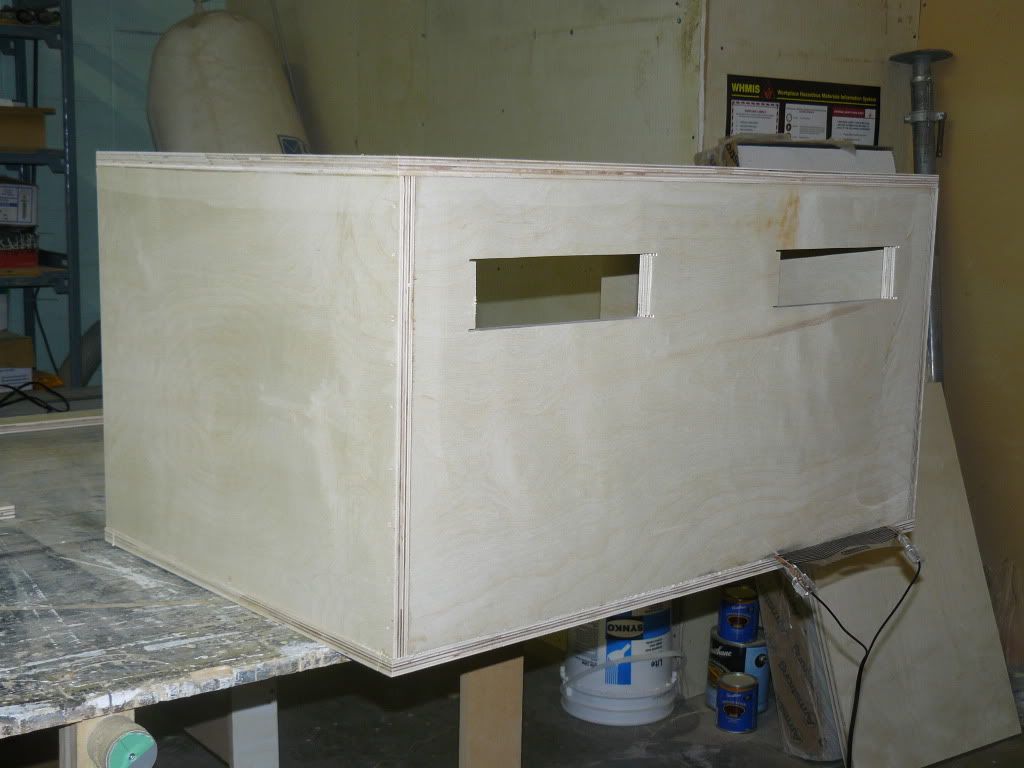
Cut openings in the back piece or side pieces for the vents. We cut the opening for the grommet near the end of assembly and centered it above the heat tape, though you could get it done at this point. As we plan on eventually making more cages and stacking them side-by-side we placed our vents and grommet in the back, however if you prefer they can be placed on opposite sides of the cage.


Attach the sides to the back piece.


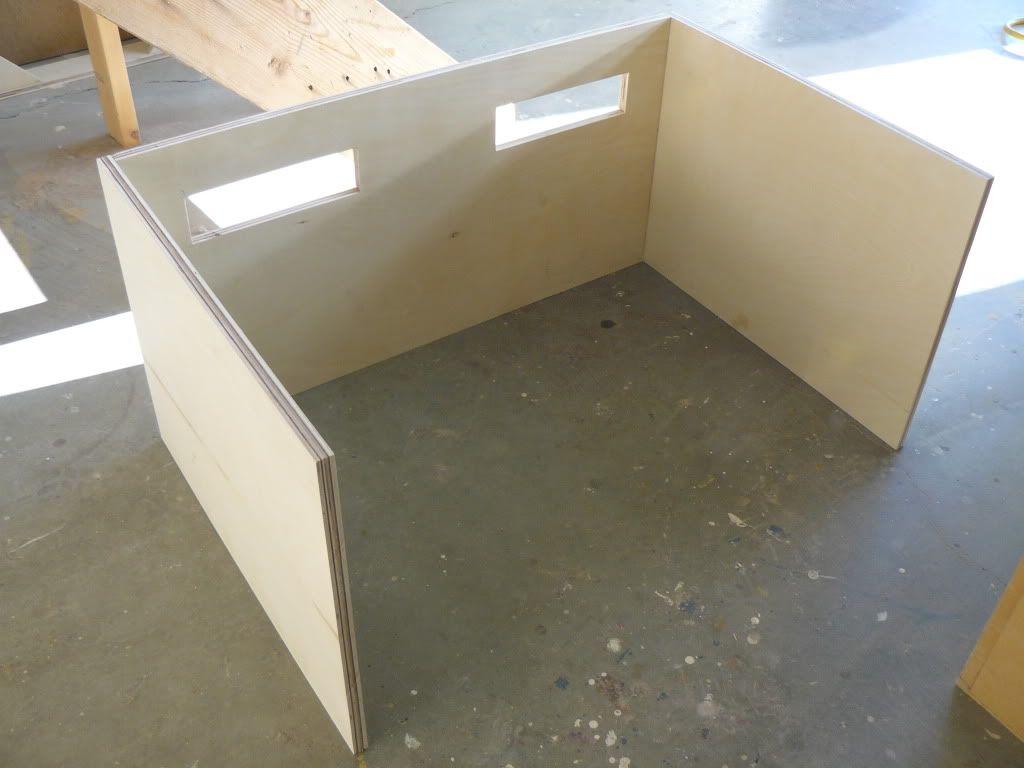
Then attach the top piece.


__________________
6.2 Corn Snakes ~ 1.0 MBK ~ 1.0 Garter ~ 2.0 Dumeril's Boas ~ 1.0.1 Gargoyle Geckos ~ 3.2 Dogs ~ 3.1 Cats
Marica is offline  
Login to remove ads
Old 12-15-10, 12:41 PM   #2
Marica
Member
 
Marica's Avatar
 
Join Date: Sep-2010
Location: Calgary, AB
Age: 42
Posts: 381
Country:
Re: DIY Wood Cage Build Guide

If you are installing heat tape inside the cage line it up on one side of the bottom piece about 3" from the side and front to leave room to glue down the linoleum, then align and attach the assembled upper portion to the bottom piece making sure not to puncture the heat tape.


Here’s a back view of the cage at this stage.


Next attach the litter dam, then align and cut the side and top trim and attach.


Cut the linoleum to fit inside the cage, apply the adhesive around the heat tape and install the linoleum. Do not glue the linoleum to the heat tape.

Next attach the ledge.

Cover the linoleum as applying the Varathane can get quite messy. I coated the inside of my cages with 3 coats of Varathane, gave it a light sanding, then applied a final fourth coat. You can also stain or paint the outside of the cage at this point. Once the interior is dry, seal the bottom edges around the lino with silicone.


We attached the glass track with cement glue, though I’ve read recommendations for Gorilla Glue and Liquid Nails on woodworking forums. Also with the track, I only lined the top and bottom, though am contemplating adding it on the sides as well.

I let the cages air out for a week once complete, though a couple days is probably sufficient.

All that’s left is to insert the glass, attach the finger pulls, install the lock and decorate the interior.

Here’s my final setup:


Thanks for looking
__________________
6.2 Corn Snakes ~ 1.0 MBK ~ 1.0 Garter ~ 2.0 Dumeril's Boas ~ 1.0.1 Gargoyle Geckos ~ 3.2 Dogs ~ 3.1 Cats
Marica is offline  
Old 12-15-10, 01:05 PM   #3
TylerWortman
Member
 
TylerWortman's Avatar
 
Join Date: Sep-2010
Location: Westerville, OH
Posts: 201
Country:
Re: DIY Wood Cage Build Guide

Man, thats awesome. Im jealous!
__________________
If you can't stand behind our troops, try standing in front of them....

0.1.0 Jungle Carpet
1.0.0 BP
TylerWortman is offline  
Old 12-15-10, 01:24 PM   #4
marvelfreak
Captain America
 
marvelfreak's Avatar
 
Join Date: Dec-2009
Location: Farmington IL.
Age: 55
Posts: 10,602
Country:
Re: DIY Wood Cage Build Guide

SWEEEEET! Man that is awesome. You could make some money building this.
__________________
Boas: 1.0 Pastel, 2.2 Brazilian Rainbows Pythons: 0.1 Lesser Royal, The Carpets 2.0 Jungle, 1.0 Jungle x Jag, 0.1 Tiger Jag, 0.1 Coastal Cheers Chuck
marvelfreak is offline  
Old 12-15-10, 02:23 PM   #5
Ch^4
3.141592653 Pythons
 
Ch^4's Avatar
 
Join Date: Oct-2010
Location: Seattle
Posts: 990
Country:
Re: DIY Wood Cage Build Guide

BEAUTIFUL! Wanna come over to my place and build me a few of these?!

Great work. I am thoroughly impressed by the level of craftsmanship and attention to details.
Ch^4 is offline  
Login to remove ads
Old 12-15-10, 02:56 PM   #6
presspirate
domi adsum
 
presspirate's Avatar
 
Join Date: Jun-2010
Location: Farmington, MN.
Age: 52
Posts: 1,880
Country:
Send a message via Yahoo to presspirate
Re: DIY Wood Cage Build Guide

Very nice comprehensive post! And great looking cages! Thanks for sharing with us!
__________________
Thanks for reading, Greg

"You hold the door open for the world forever you're never gonna get inside"
Keith Malley
presspirate is offline  
Old 12-15-10, 03:30 PM   #7
Xanafein
Member
 
Xanafein's Avatar
 
Join Date: Oct-2010
Location: San Diego
Posts: 346
Country:
Re: DIY Wood Cage Build Guide

interesting, could one of these house an adult carpet, ive been hearing mixed reviews as far as the neccasary space for one, and a build plan like this would be excelent, assuming it can house an adult comfortably
__________________
proud owner of 0.2 Jungle Carpet "Sweetheart" "Aphrodite" 0.2 Coastal Carpet "Hera" "Zecora" 0.1 Dwarf Tiger Reticulated python 100% het Albino "Amaterasu" R.I.P. 1.0 Coastal Jag "Asmodeus" Cause Severe Neuro problems
Xanafein is offline  
Old 12-15-10, 04:03 PM   #8
infernalis
Moderator
 
infernalis's Avatar
 
Join Date: May-2008
Location: Central New York State
Age: 60
Posts: 16,536
Country:
Re: DIY Wood Cage Build Guide

great looking work........
__________________
"Where would we be without the agitators of the world attaching the electrodes
of knowledge to the nipples of ignorance?"
infernalis is offline  
Old 12-15-10, 04:20 PM   #9
Marica
Member
 
Marica's Avatar
 
Join Date: Sep-2010
Location: Calgary, AB
Age: 42
Posts: 381
Country:
Re: DIY Wood Cage Build Guide

Thanks everyone.

@ Marvelfreak - For the amount of time it took me, even with the help of my tradesman father, there's no way it would be worth my time. Besides Greg's got a corner on the market here - he has a great workshop setup and has the knowledge and experience to make a variety of wonderful cages.

@ Ch^4 - I didn't put all this effort into writing this guide for you to be a lazy a$$ and ask me to build you one

@ presspirate - Glad to hear. I wanted to share here first before posting elsewhere as I value the feedback on this forum.

@ Xanafein - I'm not familiar with enclosure size requirements for carpets, though this design could easily be modified and should be good at maintaining a high-humidity environment.
__________________
6.2 Corn Snakes ~ 1.0 MBK ~ 1.0 Garter ~ 2.0 Dumeril's Boas ~ 1.0.1 Gargoyle Geckos ~ 3.2 Dogs ~ 3.1 Cats
Marica is offline  
Old 12-15-10, 04:26 PM   #10
Xanafein
Member
 
Xanafein's Avatar
 
Join Date: Oct-2010
Location: San Diego
Posts: 346
Country:
Re: DIY Wood Cage Build Guide

Thats why im loving it, im already drawing up a parts list and talking to a local breeder about houseing size he says for a jungle and a coastal male they should be fine, but if i find them to be getting larger than average i would have to consider moving them to a tank with more up room

im opting for RHE over flexwatt though, and what would you reccomend for lighting for easier viewing?
__________________
proud owner of 0.2 Jungle Carpet "Sweetheart" "Aphrodite" 0.2 Coastal Carpet "Hera" "Zecora" 0.1 Dwarf Tiger Reticulated python 100% het Albino "Amaterasu" R.I.P. 1.0 Coastal Jag "Asmodeus" Cause Severe Neuro problems
Xanafein is offline  
Login to remove ads
Old 12-15-10, 06:12 PM   #11
Marica
Member
 
Marica's Avatar
 
Join Date: Sep-2010
Location: Calgary, AB
Age: 42
Posts: 381
Country:
Re: DIY Wood Cage Build Guide

Quote:
Adult Jungle carpets and Irian Jaya carpets should be kept in a cage with a minimum of 4-6 square feet of floor space, such as a 2'x2' or a 3' x 2' cage. Cages should be 15"-24" high. Any taller and the cage will become difficult to maintain a proper heat gradient. As a rule of thumb for pythons in general, some keepers say that one square foot of floor space per foot in length is optimal, but I think slightly less than one square foot is fine for carpets, due to their slim build.
Xanafein, I found the above housing info on ACReptiles. As for display lighting I've seen others use under-cabinet LED lights / lighting strips.
__________________
6.2 Corn Snakes ~ 1.0 MBK ~ 1.0 Garter ~ 2.0 Dumeril's Boas ~ 1.0.1 Gargoyle Geckos ~ 3.2 Dogs ~ 3.1 Cats
Marica is offline  
Old 12-16-10, 03:44 PM   #12
percey39
Hots Down Under
 
percey39's Avatar
 
Join Date: Nov-2009
Location: melbourne
Posts: 1,734
Country:
Re: DIY Wood Cage Build Guide

Great work, they look fantastic and to think what you would of paid for all of them from a shop! Its always fun building your own as you can do things your own way.
__________________
I wish I knew everything when I started out in keeping snakes, like some obviously do.
percey39 is offline  
Old 01-14-11, 01:00 PM   #13
2006gt
Member
 
2006gt's Avatar
 
Join Date: Jan-2011
Location: San jose, CA
Posts: 244
Country:
Re: DIY Wood Cage Build Guide

AWESOME!!! thats all i can say other than im jelous i couldnt do it hahahah
2006gt is offline  
Old 01-14-11, 01:07 PM   #14
belovedboas
Member
 
belovedboas's Avatar
 
Join Date: Dec-2010
Age: 42
Posts: 484
Country:
Re: DIY Wood Cage Build Guide

That is sweet giving me ideas!! is lanoleum okay for snakes cause I have a few wooden vivs and that would look sharp as a bottom very clean i would think too!! Good work
__________________
A fool thinks himself to be wise, but a wise man knows himself to be a fool.....................William Shakespeare

Greg
belovedboas is offline  
Old 01-14-11, 01:24 PM   #15
Marica
Member
 
Marica's Avatar
 
Join Date: Sep-2010
Location: Calgary, AB
Age: 42
Posts: 381
Country:
Re: DIY Wood Cage Build Guide

Thanks. The linoleum sure does make for easy cleaning. And, yes, it has been used in reptile cages for years and I don't think I've read a single negative comment about it's use.
__________________
6.2 Corn Snakes ~ 1.0 MBK ~ 1.0 Garter ~ 2.0 Dumeril's Boas ~ 1.0.1 Gargoyle Geckos ~ 3.2 Dogs ~ 3.1 Cats
Marica is offline  
Login to remove ads
Closed Thread


Posting Rules
You may not post new threads
You may not post replies
You may not post attachments
You may not edit your posts

BB code is On
Smilies are On
[IMG] code is On
HTML code is Off

Forum Jump


All times are GMT -6. The time now is 05:07 PM.

Powered by vBulletin®
©2000 - 2025, Jelsoft Enterprises Ltd.
Copyright © 2002-2023, Hobby Solutions.

right