|
|  |
| Notices |
Welcome to the sSnakeSs community. You are currently viewing our boards as a guest which gives you limited access to view most discussions and access our other features. By joining our free community you will have access to post topics, communicate privately with other members (PM), respond to polls, upload content and access many other special features. Registration is fast, simple and absolutely free so please, join our community today! If you have any problems with the registration process or your account login, please contact contact us.
|
 04-26-14, 08:07 PM
|
#31
|
|
Member
Join Date: Apr-2014
Location: Middle of Texas
Age: 44
Posts: 1,463
Country: 
|
Re: My DIY Snakeroom. Work in progress.
It's looking good my friend 
|

|
|
|
04-27-14, 05:19 AM
|
#32
|
|
Forum Moderator
Join Date: Jan-2014
Posts: 4,329
Country: 
|
Re: My DIY Snakeroom. Work in progress.
Thank you
__________________
Aho ni toriau baka!- Baka wa shinanakya naoranai...
|
|
|
|
|
04-27-14, 09:36 AM
|
#33
|
|
Member
Join Date: Jul-2013
Location: The Colony, Texas
Age: 67
Posts: 4,772
Country:
|
Re: My DIY Snakeroom. Work in progress.
Looking better each time!
__________________
0.1 Mexican Black King Snake (Medusa) | 1.0 Black Milk Snake (Darth) | 1.0 Desert King Snake (Tut)
Steve
|
|
|
|
|
05-04-14, 05:33 AM
|
#34
|
|
Forum Moderator
Join Date: Jan-2014
Posts: 4,329
Country:
|
Re: My DIY Snakeroom. Work in progress.
Working hard all weekend, need to get the woodwork finished!!
We also made really nice plans, we are going to be building 2 large viv's across the room, one will be 10*6 feet.. and the other is going to be 10*3ish feet. This will probably not been really soon, as we plan to finish the bathroom and downstairs toilet first.. But i will start a build thread about those as soon as we start them.
__________________
Aho ni toriau baka!- Baka wa shinanakya naoranai...
|
|
|
|
|
05-04-14, 10:31 AM
|
#35
|
|
Member
Join Date: Feb-2014
Age: 55
Posts: 519
Country: 
|
Re: My DIY Snakeroom. Work in progress.
Looking great mate
|
|
|
|
|
05-04-14, 12:31 PM
|
#36
|
|
Forum Moderator
Join Date: Jan-2014
Posts: 4,329
Country:
|
Re: My DIY Snakeroom. Work in progress.
Thx mate
__________________
Aho ni toriau baka!- Baka wa shinanakya naoranai...
|
|
|
|
|
07-30-14, 04:58 AM
|
#37
|
|
Forum Moderator
Join Date: Jan-2014
Posts: 4,329
Country:
|
Re: My DIY Snakeroom. Work in progress.
I haven't updated this in a bit, and it's been slow since we had quite some issues. We're quite far now, and we're not giving up! We did postpone the plans for the 2- 10foot tubs for at-least a year, since we got other priorities at the moment (The money is not coming in as it used to, and i rather finish the rest of the house first). But they're still coming! We'll probably start on those next summer, hoping things will be easier by then. But we already started saving up for them. Luckily these were all paid for, and its just a matter time before they are in use.
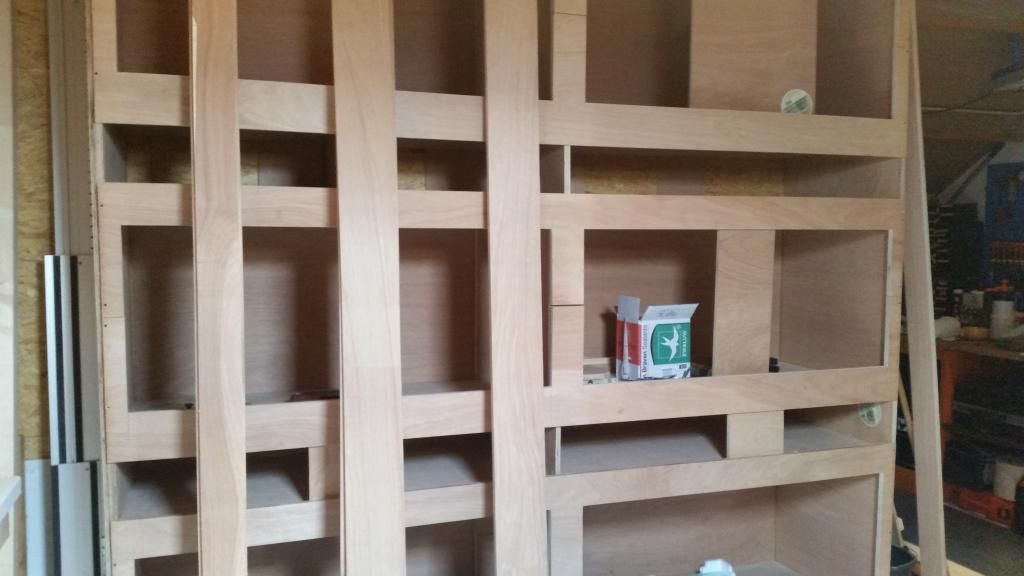
All the wood sized down properly, ready for the final assembly! This picture was taken a while back.
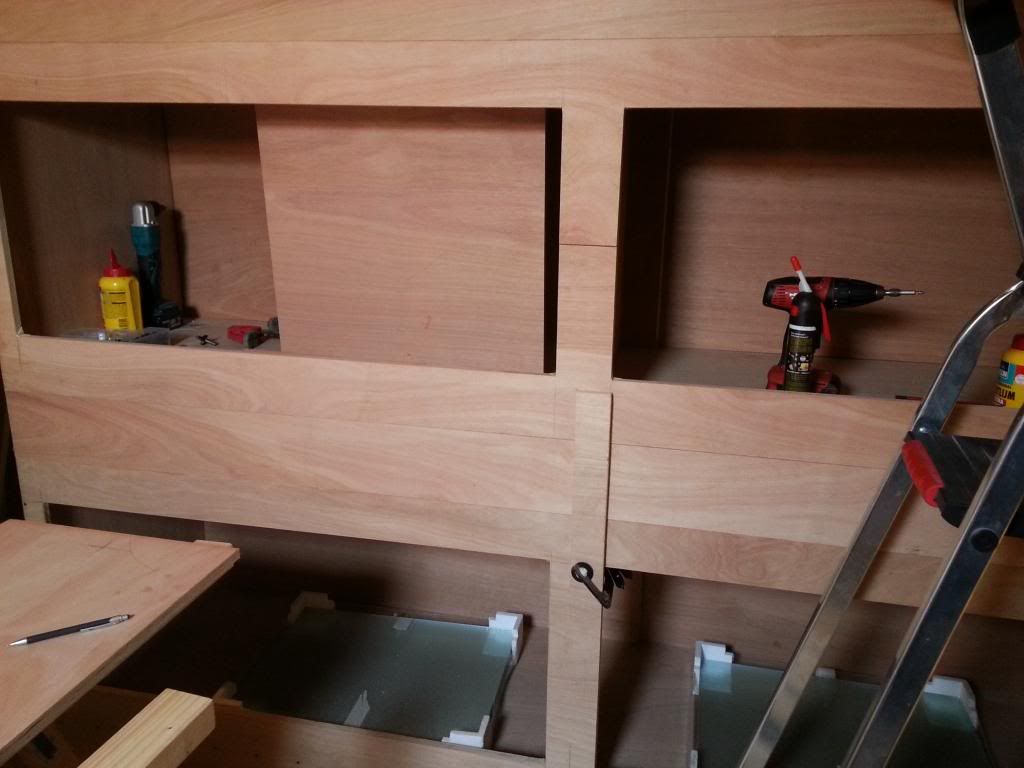
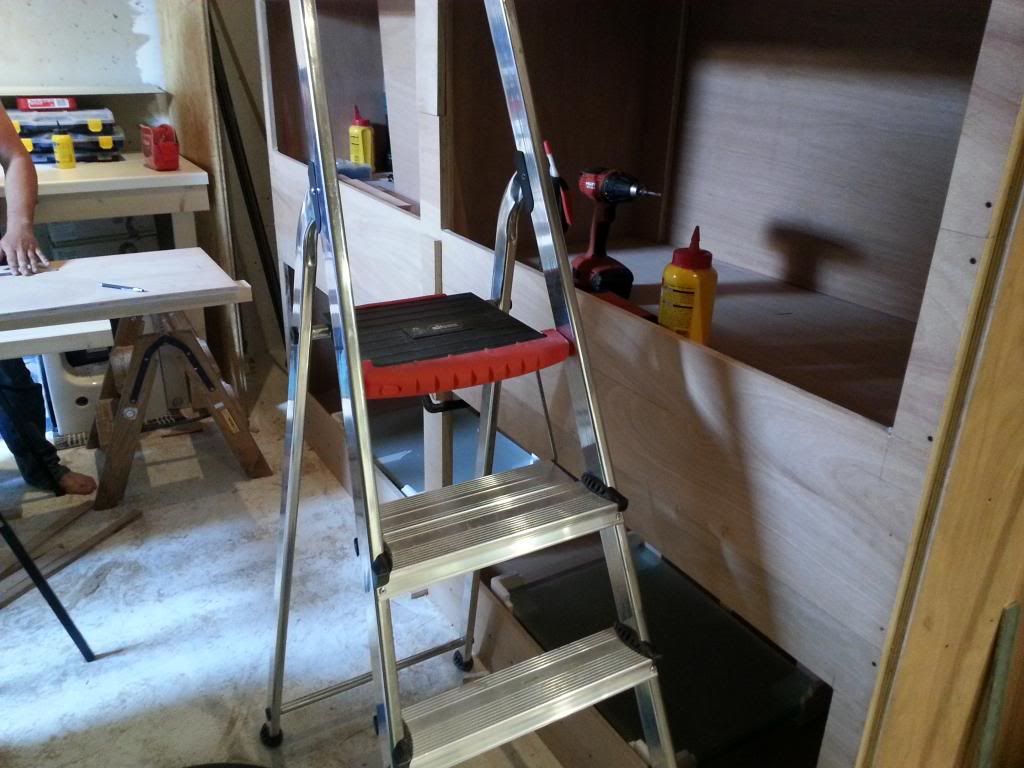
Completely assembled! Pictures of 2 weeks ago. The gaps is where the lighting fixtures etc will be, the boards seen on the previous pictures slide in there so it closes of nicely, while still being able to access the fixtures.. (I forgot to put them in for these pictures) I can't take a picture of the entire thing, since it's 8feet tall! So top/bottom pics is the best i can do. They don't look as massive on the photo's as they do in real life, but the undivided (bottom) tub is large enough for me to lay down in, just to give you an idea. Also very pleased that we found a way to very easily remove the board that separates the middle tub into 2. Just a matter of unscrewing a few boards and it comes sliding right out. Which is nice since i'm not 100% sure yet when we will finish the 10 foot tubs, but i don't have to shy away from buying a nice giant when i see one! if it's not done by the time it outgrows the half sized tub, by removing separator we're set for another few years!
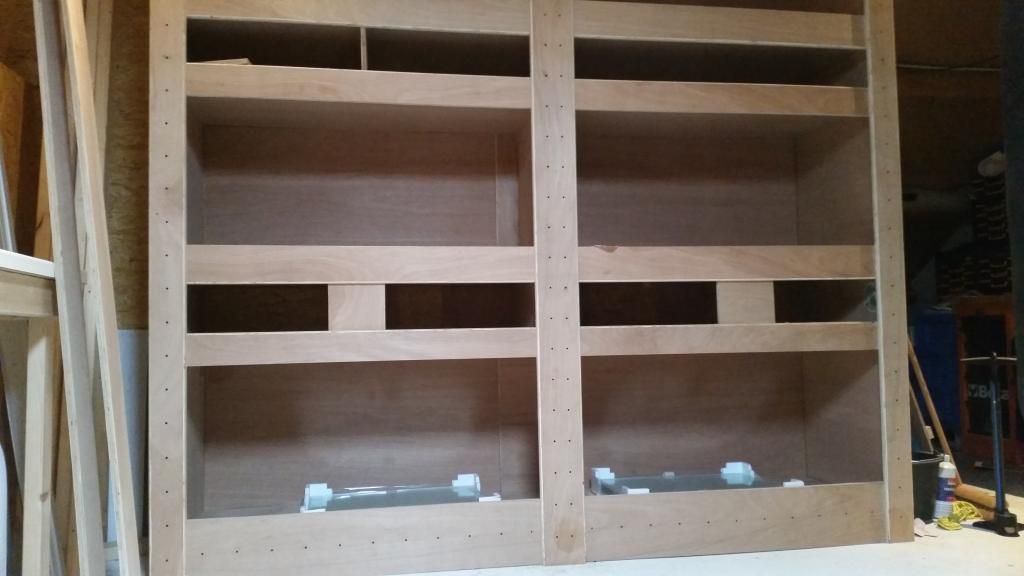
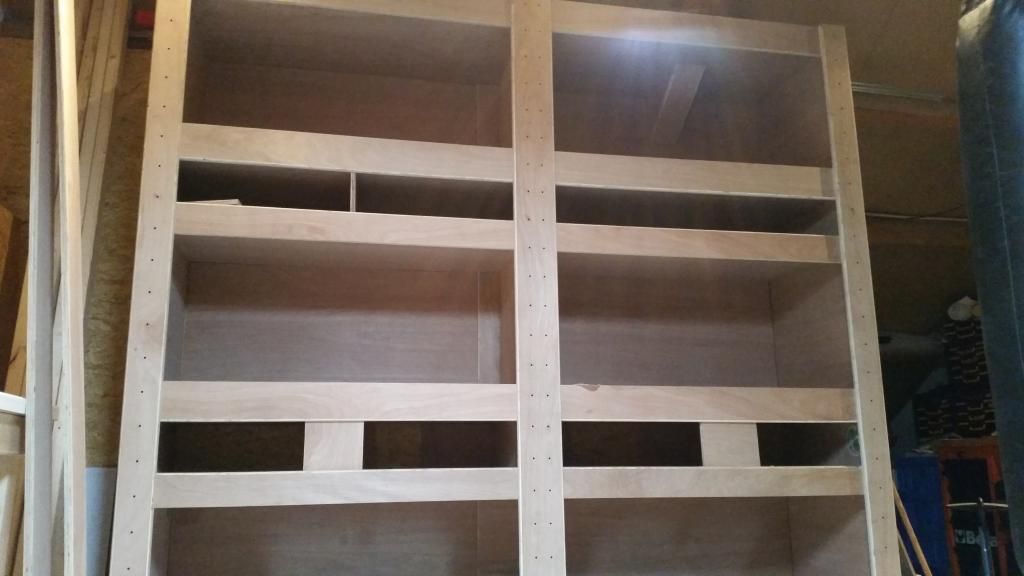
So far since those last pictures were taken, we have added ventilation. The the glass sliders are all cut into the right size, completely ready for installation. Waiting for my heat-cables to arrive, and the covers for the ventilation. I had planned to make nice backgrounds for all the tubs, however this is costly. Also, we chose to go for really nice looking wood because i think it looks better than painting the outsides. I'll probably end up just treating the wood as is, on the in and the outside. It would be easier to clean as well. Even if it might not show on the pictures, but it really is a nice looking wood.
__________________
Aho ni toriau baka!- Baka wa shinanakya naoranai...
|
|
|
|
|
07-30-14, 08:53 AM
|
#38
|
|
Member
Join Date: Jul-2013
Location: The Colony, Texas
Age: 67
Posts: 4,772
Country:
|
Re: My DIY Snakeroom. Work in progress.
Awesome!!!! You are keeping a carpenter busy! lol
Quote:
Originally Posted by Tsubaki

I haven't updated this in a bit, and it's been slow since we had quite some issues. We're quite far now, and we're not giving up! We did postpone the plans for the 2- 10foot tubs for at-least a year, since we got other priorities at the moment (The money is not coming in as it used to, and i rather finish the rest of the house first). But they're still coming! We'll probably start on those next summer, hoping things will be easier by then. But we already started saving up for them. Luckily these were all paid for, and its just a matter time before they are in use.
All the wood sized down properly, ready for the final assembly! This picture was taken a while back.
Completely assembled! Pictures of 2 weeks ago. The gaps is where the lighting fixtures etc will be, the boards seen on the previous pictures slide in there so it closes of nicely, while still being able to access the fixtures.. (I forgot to put them in for these pictures) I can't take a picture of the entire thing, since it's 8feet tall! So top/bottom pics is the best i can do. They don't look as massive on the photo's as they do in real life, but the undivided (bottom) tub is large enough for me to lay down in, just to give you an idea. Also very pleased that we found a way to very easily remove the board that separates the middle tub into 2. Just a matter of unscrewing a few boards and it comes sliding right out. Which is nice since i'm not 100% sure yet when we will finish the 10 foot tubs, but i don't have to shy away from buying a nice giant when i see one! if it's not done by the time it outgrows the half sized tub, by removing separator we're set for another few years!
So far since those last pictures were taken, we have added ventilation. The the glass sliders are all cut into the right size, completely ready for installation. Waiting for my heat-cables to arrive, and the covers for the ventilation. I had planned to make nice backgrounds for all the tubs, however this is costly. Also, we chose to go for really nice looking wood because i think it looks better than painting the outsides. I'll probably end up just treating the wood as is, on the in and the outside. It would be easier to clean as well. Even if it might not show on the pictures, but it really is a nice looking wood. |
__________________
0.1 Mexican Black King Snake (Medusa) | 1.0 Black Milk Snake (Darth) | 1.0 Desert King Snake (Tut)
Steve
|
|
|
|
|
07-30-14, 09:30 AM
|
#39
|
|
Forum Moderator
Join Date: Jan-2014
Posts: 4,329
Country:
|
Re: My DIY Snakeroom. Work in progress.
hehe we're not carpenters but thank you !
__________________
Aho ni toriau baka!- Baka wa shinanakya naoranai...
|
|
|
|
|
08-20-14, 02:09 PM
|
#40
|
|
Forum Moderator
Join Date: Jan-2014
Posts: 4,329
Country:
|
Re: My DIY Snakeroom. Work in progress.
Sooo close to completion now! Had some problems with the heating cables i ordered, not the right length.. Seriously, nothing going as planned. In stead of chasing after them.. I just asked for a refund, and decided to go for something better anyway... RPH's. More expensive, but a lot less troublesome to set up (Don't have to make a double floorspace to protect the cable). Ordering them tomorrow.
Left to do:
-Varnish/stain outside of the flat, to make it look nice. Considering giving it a 'old' looking finish. Would look nice with the rough finish.
-Lacquer and Sealant inside of the flat, to make it waterproof.
-Put windows in place.
-Place RHP's and hook them up.
-Decorate!
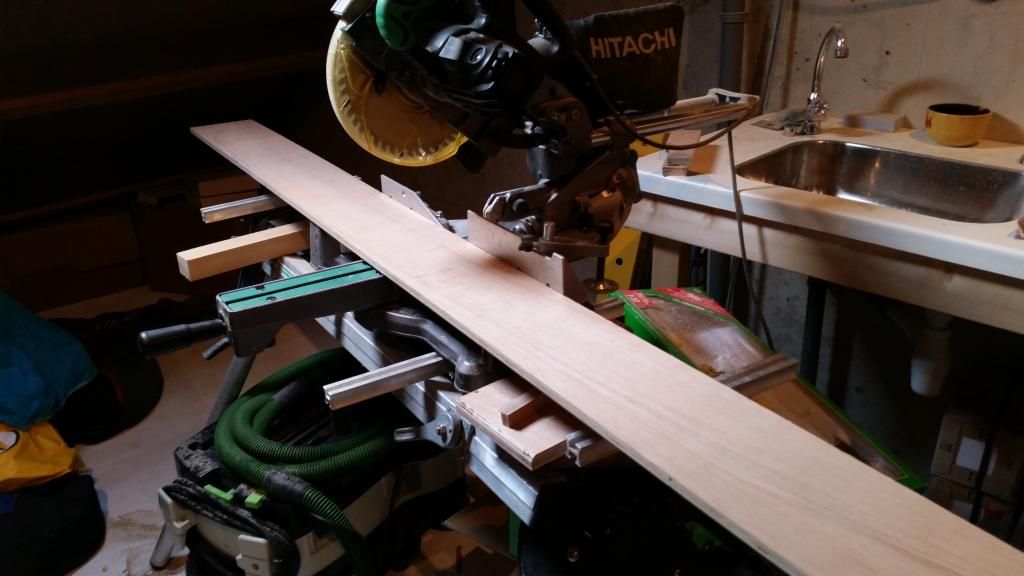
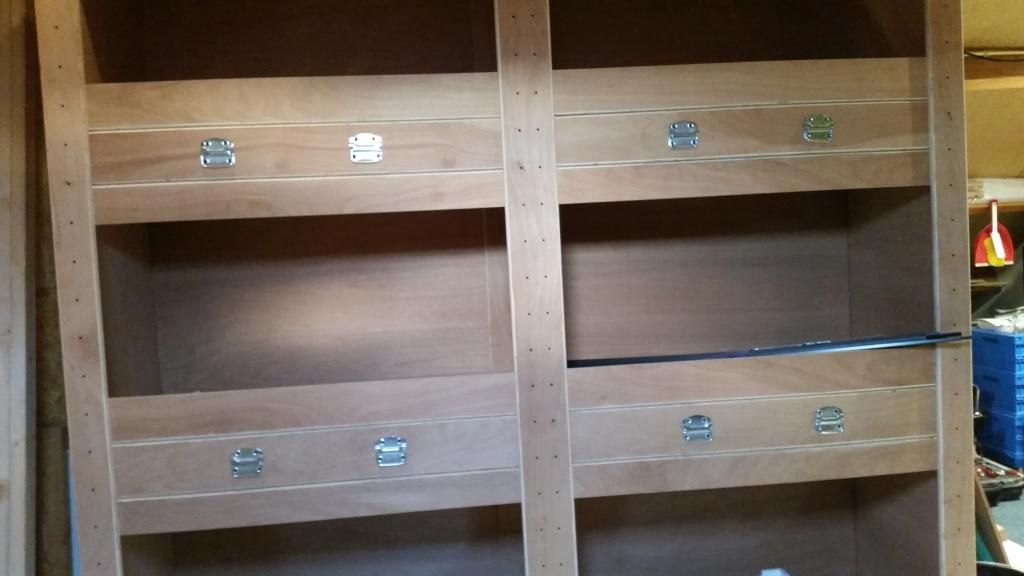
The last bit of sawing (hopefully)
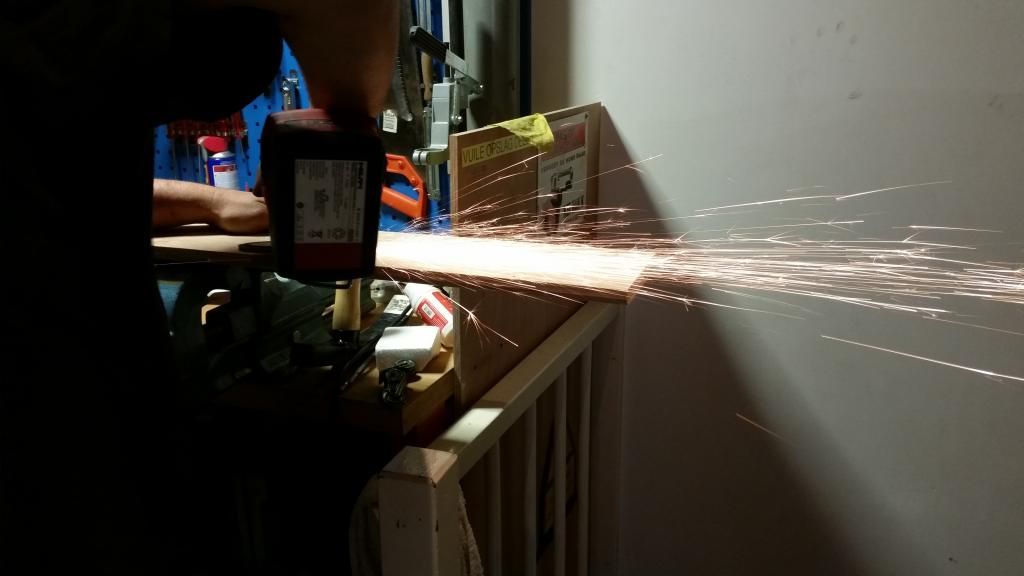
Sparks!
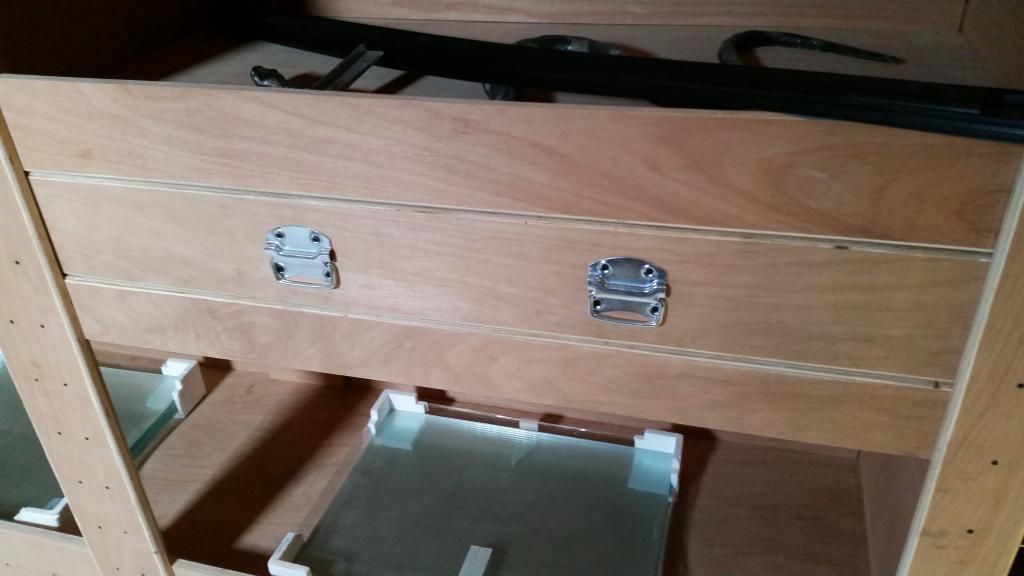
The handles i picked out for the 'maintenance hatches' The lighting fixtures will be in here, as well as the wires etc for the RPH's. Ventilation for the bottom 2 terrariums will also go through these spaces.
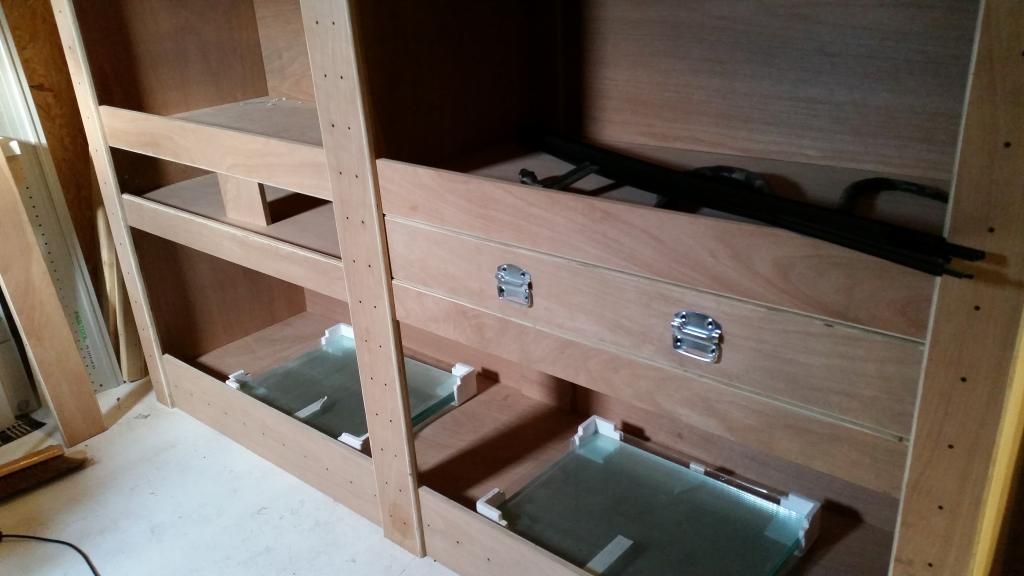
Took forever to get the 2nd one to fit, had to sand it down.
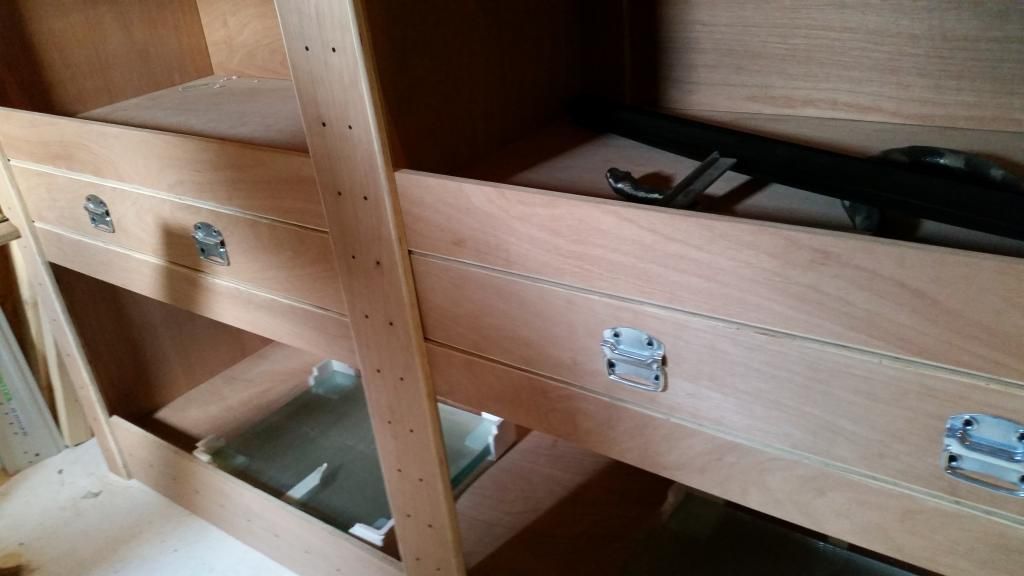
All 4 in place!
__________________
Aho ni toriau baka!- Baka wa shinanakya naoranai...
|
|
|
|
|
08-20-14, 03:11 PM
|
#41
|
|
Member
Join Date: Jul-2012
Posts: 1,236
Country:
|
Re: My DIY Snakeroom. Work in progress.
Looks great. You guys do good work for "not carpenters"
|
|
|
|
|
08-21-14, 04:40 AM
|
#42
|
|
Forum Moderator
Join Date: Jan-2014
Posts: 4,329
Country:
|
Re: My DIY Snakeroom. Work in progress.
Thanks! And i'm really happy with how it turned out so far Can't wait to start using them.
__________________
Aho ni toriau baka!- Baka wa shinanakya naoranai...
|
|
|
|
|
08-21-14, 05:16 AM
|
#43
|
|
Member
Join Date: Jun-2012
Posts: 655
Country:
|
Re: My DIY Snakeroom. Work in progress.
Wow, brilliant work! I can't wait to see finished pictures with tanks all stocked!
__________________
[Manny]LavAlbinoRetic [Cortez]AlbinoBlackRat [Honey]Corn [Tartessos]BorneoSTP [Snapdragon]GopherSnake [Candice]YellowConda [Cypress]SolomonIslandTreeBoa
[Ogden]Crestie [Apple+Kiwi+Raina+Nikolai]Leos [Manhattan+Sidney]Tokays [Bukra.Zealand.Mina.Jolene.Yoshi.Greta.Spanky.Maui]Canines ...and fish, turtles, tarantulas, guinea pigs...
|
|
|
|
|
08-21-14, 08:26 AM
|
#44
|
|
Member
Join Date: Jul-2012
Posts: 1,236
Country:
|
Re: My DIY Snakeroom. Work in progress.
Quote:
Originally Posted by Tsubaki
Thanks! And i'm really happy with how it turned out so far Can't wait to start using them. |
So... what kind of snakes are these for?
|
|
|
|
|
08-21-14, 12:51 PM
|
#45
|
|
Forum Moderator
Join Date: Jan-2014
Posts: 4,329
Country:
|
Re: My DIY Snakeroom. Work in progress.
Well nothing is set in stone yet but i already have a housing plan set up.
The bottom one will soon be the housing for my 2 year old tiger retic. (when(/if) she starts to outgrow them, we will be building 2- 10*8foot enclosures next year.)
The middle one is currently still divided into 2 tubs, one of them will house my Burmese python i'm picking up in October(after he gets out of quarantine) If he outgrows it before he can move to the bottom tub, the middle tub has a removable separator to give him more room.
The 2 top terrariums going to house my Nicaragua's in them.
In the Future i will have 2 10foot enclosures extra, which i plan to build next year. So i will have 2/3 (depending if i put separator in) vacant terrariums. I'm not sure what animals will be added to the collection though, i'll see what i run into.
__________________
Aho ni toriau baka!- Baka wa shinanakya naoranai...
|
|
|
|
| Thread Tools |
|
|
| Display Modes |
 Linear Mode Linear Mode
|
 Posting Rules
|
You may not post new threads
You may not post replies
You may not post attachments
You may not edit your posts
HTML code is Off
|
|
|
All times are GMT -6. The time now is 01:11 PM.
Powered by vBulletin®
©2000 - 2025, Jelsoft Enterprises Ltd.

Copyright © 2002-2023, Hobby Solutions.
|
 |


